

If you're looking for a powerful, low-impact way to build full-body strength and crank up your cardio, look no further than battle ropes. The best way to jump in is with foundational movements like Alternating Waves and Rope Slams. Stick to short bursts of 20-30 seconds, followed by a good rest, and you'll be amazed at how this simple tool delivers a killer workout that grows with you.
Why Battle Ropes Might Be Your New Favorite Workout
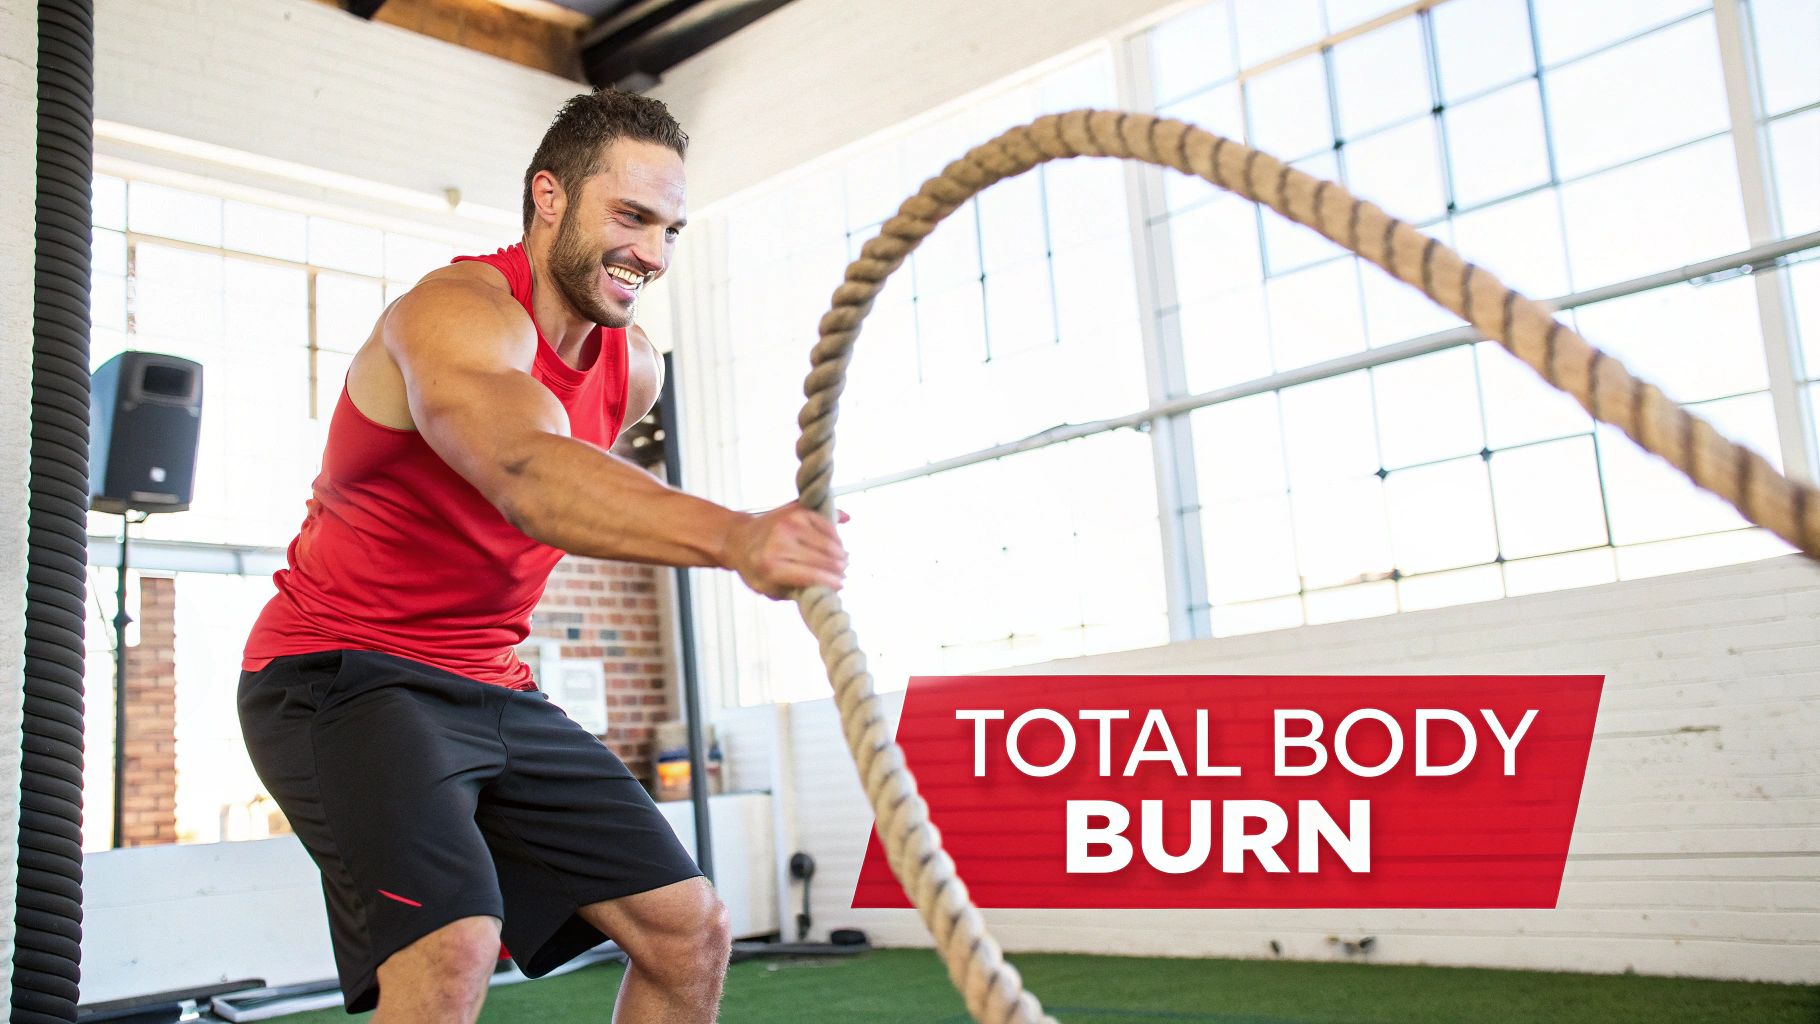
Let's be honest, battle ropes look intimidating. But don't let their appearance fool you; they are one of the most accessible and surprisingly effective tools in the gym, especially for beginners. A single set of ropes can give you a dynamic workout that builds muscle, torches fat, and gets your heart pumping—all without the harsh impact of running or jumping.
The real magic is how they combine resistance with cardio. Unlike lifting a dumbbell from point A to point B, battle ropes force you into constant, fluid motion, challenging your body in an entirely new way.
- Total-Body Takedown: Every wave you create travels from your hands down to your core and legs. Your arms, shoulders, back, and abs are all firing at once to control the movement.
- High Intensity, Low Impact: You can get your heart rate soaring without pounding your joints. This makes it a fantastic, sustainable choice for long-term fitness.
- Serious Calorie Burn: Keeping those ropes moving demands a ton of energy. It’s an incredibly efficient way to burn calories and boost your metabolism in short, intense bursts.
The Science Behind the Slam
This isn't just gym talk; the benefits are backed by research. Studies have shown that even basic wave patterns can burn up to 10-15 calories per minute. One study from the NSCA revealed that simple double-arm waves can push your heart rate to 85-90% of its max in just 30 seconds. That's a serious cardio punch in a very short amount of time.
This unique blend of strength and cardio is what makes battle ropes so effective. Very few other single pieces of equipment can challenge your body in this way, making it an incredibly efficient tool for getting fit.
Building a Strong Foundation
For anyone new to fitness, mastering proper form is everything. Battle ropes are a fantastic teacher. They force you to generate power from your hips and core and transfer it out through your arms—a fundamental principle in nearly every athletic movement you can think of.
This skill isn't just for athletes; learning to move from your core helps with everyday activities and protects you from injury.
As you start out, remember that consistency is far more important than intensity. Building good habits will pay off in the long run. To round out your routine, check out these bodybuilding tips for beginners, as they provide a solid foundation that pairs perfectly with the functional strength you’ll build with ropes. You can also see how they fit into a great home gym by exploring our guide to https://monfitness.com/blogs/news/home-workout-equipment-essentials.
Your Guide to a Perfect Battle Rope Setup
Before you even think about starting your first workout, we need to get your setup dialed in. A solid, safe foundation is non-negotiable. Getting this right from the jump means you can focus on your training without any frustrating interruptions, and most importantly, it keeps you safe. Let's walk through how to pick the right rope and anchor it securely, whether you're working out in a garage, basement, or backyard.
First things first, let's talk about the rope itself. The sheer variety can feel overwhelming, but for someone just starting out, the choice is actually pretty simple.
- Diameter: Go with a 1.5-inch diameter rope. It's the gold standard for beginners. It has enough heft to challenge you but is manageable enough that your grip won't give out before your muscles do, allowing you to focus on learning proper form. That 2-inch rope you see? It's a different beast entirely and best left for when you're much more advanced.
- Length: A 30 to 40-foot rope is the sweet spot for most people. This length gives you enough slack to create powerful, flowing waves and typically fits well in most home gym spaces. A 50-foot rope demands a lot more real estate and generates significantly more resistance.
Picking the right rope isn't just about the workout—it's about setting yourself up for success from day one. Grabbing a rope that's too heavy or long is a classic beginner mistake that can lead to sloppy form and potential injury. If you want to see what a good beginner-friendly option looks like, check out this quality battle rope that hits all the right specs.
Finding and Securing Your Anchor Point
Got your rope? Great. Now for the most critical step: anchoring it. An unsecured rope is not only ineffective, it's a genuine safety hazard. You need an anchor point that is absolutely immovable. Think about it—it has to withstand you putting maximum effort into every wave and slam without budging, shifting, or breaking.
For an indoor setup, you've got a couple of reliable options:
- Wall/Floor Anchor: This is the best-case scenario. A dedicated anchor mount drilled into a concrete wall or floor is permanent and rock-solid. You install it once and never have to think about it again.
- Heavy Equipment: If drilling holes isn't in the cards, you can get creative. Loop the rope around the base of a heavy squat rack, power cage, or even a stack of your heaviest kettlebells. Just make absolutely certain the equipment is heavy enough that it won't slide around when you start moving.
Training outdoors often gives you more flexibility. A sturdy tree, a basketball pole, a solid fence post, or even a cemented-in park bench can work perfectly. Before you commit, give your chosen anchor a good shake to ensure it’s stable and won't be damaged by the rope's friction.
Pro-Tip: No matter what anchor you use, always test it before you go all-out. Give the rope a few strong tugs and perform some light waves. You want to be 100% sure everything is secure and there's no unexpected movement.
Getting the Slack Just Right
The final piece of the setup puzzle is your own positioning. Once the rope is anchored, grab the handles and walk backward. You're looking for a gentle curve or "U" shape in the middle of the rope as it rests on the floor.
You don't want the rope pulled completely taut—that tension will kill your ability to make waves. On the flip side, too much slack on the floor will cause your waves to die out before they can even travel to the anchor point.
Find that sweet spot in the middle where the rope feels alive and responsive. This simple adjustment ensures every ounce of your effort translates into a powerful, effective workout right from the very first slam.
Mastering 7 Essential Battle Rope Movements
Alright, your rope is anchored and you're ready to go. Now for the fun part. The secret to getting good with battle ropes isn't learning a dozen fancy moves; it's about mastering a handful of foundational ones. Get these right, and you'll build a powerful base for everything else.
We're going to walk through 7 core movements. As we go, really focus on the feel of each exercise. Pay attention to your posture and breathing. The power should come from your entire body—hips, core, legs—not just a frantic arm-pumping session. Nailing the form now will save you from bad habits and get you results faster.
Before you dive in, a quick reminder to double-check your setup. This simple three-step process is the key to a safe and effective workout.
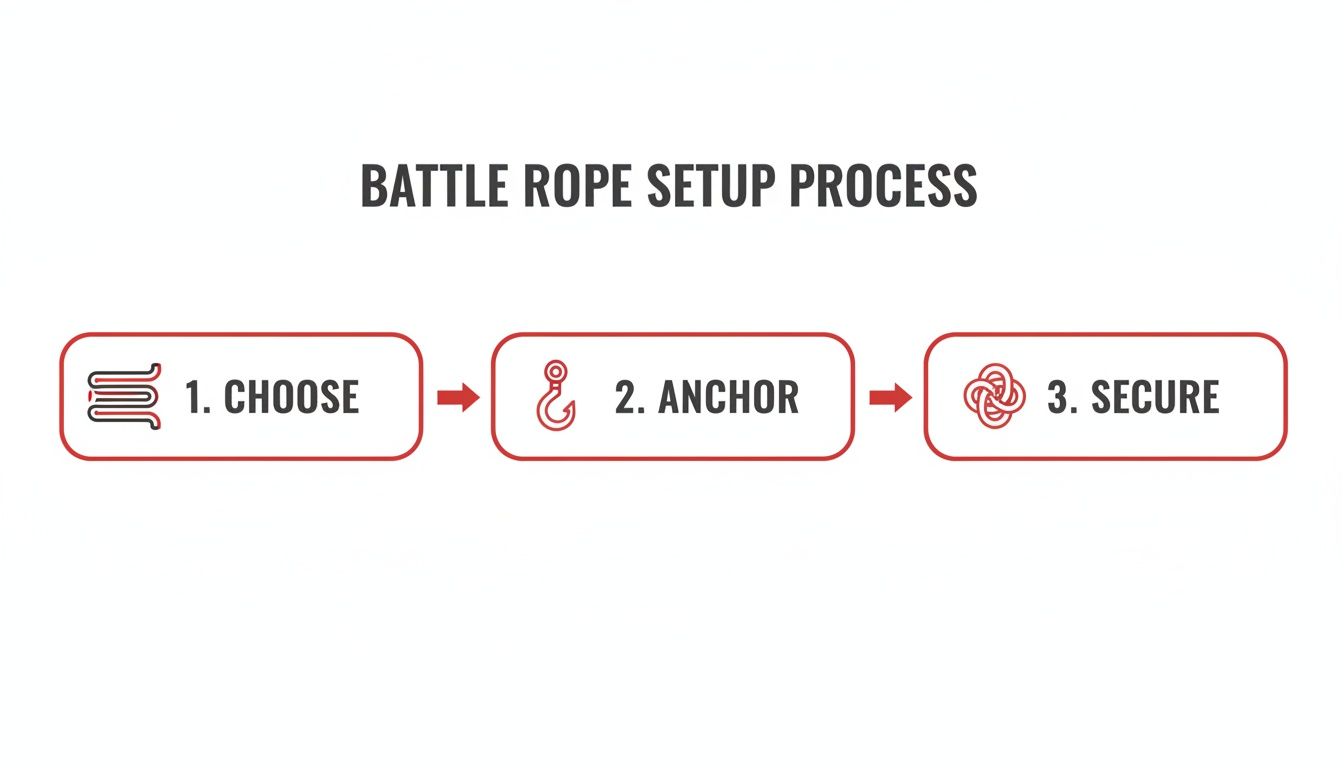
As the graphic shows, it’s all about choosing the right rope, finding a solid anchor point, and securing it properly before you start swinging.
The Alternating Wave: Your Classic Starter
This is the bread and butter of battle rope training and the perfect place for any beginner to start. It’s all about teaching you rhythm, coordination, and how to hold a solid athletic stance while your upper body is working hard.
Here’s how you do it:
- Stand with your feet shoulder-width apart. Drop into a slight quarter-squat, keep your chest up, and brace your core.
- Grab one rope end in each hand with a neutral grip, so your palms are facing each other.
- Flick your right arm up to about shoulder height, and just as it starts coming down, flick your left arm up.
- You’re aiming for a smooth, continuous “up-and-down” motion that sends ripples flying down the rope.
The goal is to find a snappy, fluid rhythm. Don’t try to muscle through it with just your arms. Let your hips and core do some of the work.
Double Waves: The Power Builder
Once you've got the alternating rhythm down, it's time to move both ropes together. This one is a serious step up in intensity. It demands more raw power and core stability, lighting up your shoulders, back, and lungs.
Coaching Cues:
- Power from the Ground Up: Drive the movement by slightly extending your hips and knees as you lift the ropes. Absorb the force as you slam them back down.
- Keep Your Core Tight: Think of your midsection as the bridge between your legs and arms. A braced core keeps your lower back safe and makes the move way more powerful.
- Breathe! Exhale with force as you slam the ropes down and inhale on the way up. Whatever you do, don't hold your breath.
A common mistake I see with Double Waves is people standing too tall and just using their arms. You have to get into that athletic quarter-squat. It lowers your center of gravity and lets you tap into the big, powerful muscles in your legs and glutes.
Rope Slams: The Ultimate Stress Reliever
If you want an exercise that builds pure, explosive power and lets you blow off some steam, this is it. The Rope Slam is less about rhythm and all about one single, violent burst of energy. It’s an incredible move for your lats, core, and shoulders.
Perfecting the Slam:
- Stand with your feet a little wider than your shoulders. Hold both rope ends together with an overhand grip.
- In one explosive motion, raise the ropes straight overhead. You can even come up onto the balls of your feet to get a little extra height.
- Instantly reverse direction and slam the ropes down onto the floor with everything you've got.
- As you slam, hinge at your hips and bend your knees, finishing in a deep, athletic crouch.
Think of it like you're chopping wood. The power comes from a fast, aggressive hip hinge, not from just yanking down with your arms.
Side-to-Side Snakes: A Core Crusher
Time to switch planes. Instead of up and down, we're going side to side. The Snake creates a slithering motion on the floor that puts a unique and intense burn on your core, obliques, and shoulders.
How to Execute Snakes:
- Stance: Get into that familiar athletic squat, but this time hold the ropes with your palms facing down.
- Movement: Keeping your arms fairly straight, sweep both ropes from side to side at the same time. Try to keep your hands close together.
- Focus: The goal is to create a horizontal "S" pattern that travels all the way to the anchor point.
To really get the most from this one, try to keep your hips and lower body as still as possible. All the rotation should come from your torso, which is what builds incredible core stability.
Outside Circles: For Shoulder Mobility and Endurance
This movement is fantastic for building up shoulder endurance and improving mobility, all while giving your core another good challenge. Instead of waves, you’ll be creating big, circular patterns.
Movement Breakdown:
- Start in your athletic stance, one rope in each hand.
- Draw large circles with the ropes, moving from the inside out. Your right arm will circle clockwise, and your left arm will circle counter-clockwise.
- Keep the circles smooth and the ropes taut the entire time.
Once you’ve done a set of these, switch it up to Inside Circles by reversing the direction. This hits the shoulder muscles from a slightly different angle.
The Russian Twist Wave: An Oblique Challenge
Here we take the classic Russian Twist from ab workouts and add the dynamic chaos of the battle ropes. This is an absolutely killer core exercise that zeroes in on your obliques—the muscles along the sides of your stomach.
Getting Started:
- Sit on the floor facing the anchor point with your knees bent and heels on the ground.
- Lean back just enough that you feel your abs fire up. Keep your back straight!
- Hold both rope ends together and slam them from one side of your body to the other, making sure to rotate through your torso.
If that feels too easy, lift your heels off the floor. The key is to control the movement with your core, not just swing your arms with momentum.
If you're looking to gear up, our complete battle rope collection has everything you need to find the perfect setup for your home gym.
Jumping Jacks: A Cardio Finisher
Ready to kick things into high gear? Combining battle ropes with jumping jacks creates a full-body cardio scorcher that will absolutely empty your tank. This is the perfect move to end a workout on.
Execution:
- Stand with your feet together, holding the rope ends with a neutral grip.
- As you jump your feet out wide, raise both arms out to your sides and up to shoulder height, whipping a "wave" into the ropes.
- As you jump your feet back together, bring your arms and the ropes back down.
This one takes some coordination, so don't be afraid to start slow to get the rhythm down before you pick up the pace.
Your Quick Reference for Beginner Battle Rope Exercises
To help you remember these foundational movements, here's a quick cheat sheet. It breaks down each exercise, its main muscle targets, and a key tip to focus on for proper form.
| Exercise Name | Primary Muscles Worked | Beginner's Pro-Tip |
|---|---|---|
| Alternating Waves | Shoulders, Biceps, Back, Core | Stay in a quarter-squat and focus on a snappy, rhythmic motion. |
| Double Waves | Shoulders, Lats, Core, Glutes | Generate power from your hips, not just your arms. Exhale on the slam. |
| Rope Slams | Lats, Core, Glutes, Hamstrings | Hinge at the hips aggressively, like you're chopping wood. |
| Side-to-Side Snakes | Core, Obliques, Shoulders | Keep your lower body still; all rotation should come from your torso. |
| Outside Circles | Shoulders, Upper Back, Core | Draw big, smooth circles and keep constant tension on the ropes. |
| Russian Twist Wave | Obliques, Abs, Lats | Rotate your entire torso with each slam; don't just swing your arms. |
| Jumping Jacks | Full Body (Cardio) | Start slow to nail the coordination between your arm waves and leg jumps. |
Keep this table handy as you start your training. Focusing on that one pro-tip for each exercise will make a huge difference in how effective—and safe—your workouts are.
Putting It All Together: Your First Workouts

Alright, you’ve put in the work to learn the essential movements and dial in your form. Now comes the fun part—stringing these powerful battle rope exercises for beginners into real, effective workouts that get results. The best way to start is with a solid plan, so you can just grab the ropes and go.
Here are three plug-and-play routines I've designed for anyone new to battle ropes. Each one is built around a different goal—raw speed, full-body strength, or sheer endurance—using specific work-to-rest intervals that let you push yourself safely. Pick the one that fits your day and get ready to feel the burn.
Workout 1: The 10-Minute HIIT Burnout
This is my go-to recommendation for those days when you're short on time but still want a killer session. It’s all about short, explosive bursts of effort followed by a slightly longer recovery. This approach spikes your heart rate fast, making it incredibly efficient for torching calories and revving up your metabolism.
It’s a simple circuit. You'll go all-out for 20 seconds on each exercise, then take 40 seconds to catch your breath. After you’ve done all four moves, that’s one round down.
The Circuit:
- Alternating Waves: Think speed. Focus on keeping that rhythm crisp and snappy.
- Rope Slams: Pour every ounce of power you have into each and every slam.
- Jumping Jacks (Stepped Version): Keep it low-impact by stepping your feet out instead of jumping. You'll still get that heart rate up.
- Side-to-Side Snakes: Lock in your core and keep your hips steady. Let your upper body drive the movement.
Your mission is to complete three full rounds. With the prescribed work and rest, you'll be done in exactly 10 minutes. It’s fast, furious, and it gets the job done.
Workout 2: The 15-Minute Full-Body Circuit
When you have a little more time to play with, this 15-minute routine weaves in more complex movements to challenge your entire body. We’ll bump up the work time to build more muscular endurance while keeping the intensity high. For this one, you'll work for 30 seconds and rest for 30 seconds.
The Circuit:
- Double Waves: Get your hips and core involved to power the ropes up and down.
- Outside Circles: Aim for smooth, controlled circles to build shoulder stability.
- Alternating Waves with Squats: Perform your waves while slowly moving through a squat.
- Russian Twist Waves: Get on the floor and rotate through your torso with each wave.
- Rope Slams: Finish strong with an explosive, powerful move.
Take this circuit for three rounds. That 1:1 work-to-rest ratio is a classic for a reason—it’s fantastic for building both strength and cardio fitness at the same time.
Workout 3: The 20-Minute Endurance Session
Ready to test your grit? This workout is designed to build your stamina. The focus isn't just on going hard, but on maintaining solid form over longer stretches. We’re pushing the work intervals to 40 seconds and cutting the rest to just 20 seconds. This setup forces your body to become more efficient with its energy.
The Workout Plan:
- Round 1: Alternating Waves (40s work, 20s rest)
- Round 2: Side-to-Side Snakes (40s work, 20s rest)
- Round 3: Double Waves (40s work, 20s rest)
- Repeat this sequence 4 times total.
That shorter rest period is what makes this one so tough. Your heart rate will stay elevated, which is exactly what you want for pushing your endurance to a new level. As you get more comfortable, it helps to think about your overall fitness plan; a great resource for putting it all together is this guide on how to start strength training at home.
Why Short Bursts Work: For beginners, a 2013 NSCA-backed study revealed supramaximal interval training (SMIT) with battle ropes boosts repeated sprint ability by 15-20% more than traditional HIIT, with shorter 10-15 second rests amplifying metabolic impact by 25% for faster beginner results. This makes these short, intense circuits incredibly effective for home users.
Aim to hit 2-3 of these workouts each week, making sure to take a rest day in between. As you feel yourself getting stronger, you can start adding another round, working for a little longer, or cutting your rest time down. Think of these routines as your starting line. They work even better when you have a dedicated space, so you might find some good ideas in our guide on how to build a home gym.
Getting the Most Out of Your Ropes: Common Mistakes to Avoid
Jumping into battle ropes for the first time is a blast, but it's easy to fall into a few common traps that can limit your results and even lead to injury. Think of your first few workouts as practice. Nailing the technique now means every wave and slam you do down the line will be safer and way more effective.
The biggest mistake I see beginners make? Trying to muscle through it with just their arms. Battle ropes are a full-body workout. The real power doesn't come from your shoulders—it comes from your hips, legs, and core. If your shoulders are on fire after 15 seconds but you feel nothing else, this is probably what's happening.
Mistake #1: Making It an "All-Arms" Exercise
If you're standing up straight and stiff, your arms are left to do 100% of the work. This will burn out your shoulders in record time, create messy, ineffective waves, and put a ton of unnecessary strain on your joints.
The fix is simple: get into a solid athletic stance. Plant your feet about shoulder-width apart, soften your knees, and hinge your hips back slightly, like you're getting ready for a squat. This brings your center of gravity down and lets you drive power from the floor, through your body, and into the ropes.
Mistake #2: Forgetting to Breathe
It sounds basic, I know. But when things get intense, our first instinct is often to hold our breath. This just skyrockets your blood pressure and cuts off the oxygen your muscles are screaming for, causing you to burn out way too fast.
Instead, find a breathing rhythm that syncs with the exercise.
- For Waves: Just breathe. Seriously. Keep it steady and continuous. Don’t overthink it by trying to match a breath to every single wave.
- For Slams: This is where you get intentional. Take a big inhale as you lift the ropes overhead, then let out a powerful, audible "ha!" as you slam them down.
Breathing this way keeps you in control, helps you maintain your intensity, and keeps the movements powerful from start to finish.
Remember, the goal is fluid power, not frantic tension. A relaxed face and steady breathing are signs of efficient movement. If you're gritting your teeth and holding your breath, it’s time to reset.
Mistake #3: Letting Your Core Go Loose
Your core is the bridge between your lower and upper body. If it’s not engaged, your lower back is forced to pick up the slack, and that's a recipe for aches and pains.
Before you even start the first wave, brace your abs like you're about to take a punch to the gut. This locks your torso into a stable position, protecting your spine and letting you transfer power cleanly. If you feel your lower back starting to arch, stop, reset your stance, and re-engage your core.
Fixing these fundamentals is what unlocks the true power of battle ropes. A 2013 study actually found that double-arm battle rope exercises created 20-30% higher energy demands than many traditional lifts. When your form is on point, you can safely tap into that incredible metabolic benefit. You can even see the growing interest in battle ropes and their benefits reflected in recent market analysis.
Your Battle Rope Questions Answered
Jumping into any new fitness routine brings up a ton of questions, and that's a good thing. When you're dealing with a tool as powerful and unique as battle ropes, getting a few things straight before you start swinging is a smart move. Let's clear up some of the most common questions I hear from beginners so you can get started with total confidence.
Think of this as the practical stuff—the details that help you build a solid, effective routine right from the get-go.
How Often Should a Beginner Use Battle Ropes?
When you're just starting, aim for 2-3 sessions per week. That's the sweet spot. It gives your body plenty of time to recover and adapt, which is crucial for building strength and avoiding burnout. You don't need to go all-out for hours to see incredible results.
In fact, keeping your first few workouts short and sharp—around 10-20 minutes—is the way to go. Battle ropes are incredibly intense, so a little bit truly goes a long way.
Look, the secret sauce here isn't one heroic workout; it's consistency. Pay attention to how your body feels and find a rhythm that's challenging but sustainable. A great rule of thumb is to always give yourself at least one full day of rest between rope sessions.
Once you’ve been at it for a few weeks and feel your strength and stamina improving, you can start thinking about adding another session or tacking a few more minutes onto your workouts.
What Size Battle Rope Is Best for a Beginner?
For just about everyone new to battle ropes, a rope that's 1.5 inches in diameter and between 30 to 40 feet long is the perfect starting point. Trust me, this size hits the ideal balance between being challenging enough to work you and manageable enough to learn with.
That 1.5-inch grip is beefy enough to fire up your forearms, but it won't be so thick that your grip gives out before the rest of your body does. This lets you focus on nailing your form instead of just desperately trying to hang on.
As for the length, here’s why it matters so much:
- A 30 or 40-foot rope gives you enough slack to create those big, powerful waves you're looking for.
- It's a practical length that actually fits in most home gym setups, like a garage, basement, or backyard.
- The 50-foot ropes are a whole different beast—they're significantly heavier and need a lot more space, making them a better fit for more advanced athletes.
Picking the right size is a non-negotiable first step. It ensures your first workouts are productive and helps you sidestep the frustration of using gear that's just too much, too soon. If you want to dive deeper, you can always check out our full FAQ page.
Can I Lose Weight with Battle Ropes?
Without a doubt. Battle ropes are a phenomenal tool for weight loss, especially when you're also dialing in your nutrition. They deliver a high-intensity, full-body workout that torches an impressive amount of calories in a very short amount of time.
This style of workout is a classic example of High-Intensity Interval Training (HIIT). The reason HIIT is so effective for fat loss is that it sends your heart rate soaring and cranks your metabolism into high gear.
That metabolic boost is the real game-changer. Your body keeps burning calories at a higher rate for hours after you've put the ropes down. Weaving just two or three short battle rope sessions into your week is an incredibly efficient way to push toward your weight loss goals.
At MONFIT, our goal is to give you tools that deliver real, tangible results. Our premium battle ropes are engineered for durability and peak performance, helping you build a killer home workout routine. Take a look at our collection and find the perfect gear to kickstart your fitness journey today.


