

If you've ever felt that nagging ache in your lower back after a long day at your desk, or if you've hit a frustrating wall with your squat depth, the real problem might be hiding in plain sight: your hips.
Modern life has us sitting—a lot. We sit at desks, in cars, and on couches, which keeps our hip flexors locked in a shortened, tight position. It's this all-too-common pattern that's quietly sabotaging our hip mobility.
Over time, this creates a domino effect. Chronically tight hip flexors, combined with weak glutes and stiff inner thighs (adductors), don't just hold back your workouts. They create serious muscular imbalances that can send pain signals all over your body.
Why Your Hip Mobility Is Holding You Back
Think of your hips as the central hub for all your movement. When they’re locked up and can't move freely, other parts of your body are forced to pick up the slack, often leading to some familiar problems:
- Lower Back Pain: When your hips are too stiff to extend properly, your lower back has to over-arch to compensate. This is a classic recipe for chronic strain and discomfort.
- Knee Issues: If your hips lack stability and control, your knees often pay the price by collapsing inward during movements like squats, lunges, or even running. This puts a ton of unnecessary stress on the knee joint.
- Poor Posture: Tight hip flexors can physically pull your pelvis forward, creating an "anterior tilt." This often leads to that swayed-back look and contributes to rounded shoulders.
The good news? You can absolutely fix this. Research has even shown that a consistent hip mobility program can lead to a 30% improvement in disability scores for individuals dealing with chronic lower back pain. That’s a massive, life-changing impact.
A Smarter Way to Think About Mobility
Here's something I've learned from years of coaching: just stretching isn't the answer. To make real, lasting changes in your hip mobility, you need a more balanced and intelligent approach. Before we dive into the specific exercises, let's get a bird's-eye view of the components that make a hip routine truly effective.
Your Roadmap to Unlocking Stiff Hips
This table gives you a quick overview of the key components you'll need to build an effective hip mobility routine before we dive into the details.
| Component | Its Role in Hip Health | Practical Example |
|---|---|---|
| Soft Tissue Work | Releases knots and reduces tension in overworked muscles, preparing them for movement. | Foam rolling your quads and hip flexors. |
| Dynamic Stretching | Actively moves your joints through their full range of motion, improving flexibility. | Leg swings, hip circles, or a deep "Spiderman" lunge. |
| Corrective Strength | Activates and strengthens weak, underused muscles (like glutes) to create stability. | Glute bridges or clamshells with a resistance band. |
| Controlled Movement | Teaches your body to use its new range of motion safely and effectively. | Goblet squats with a focus on depth and proper form. |
Understanding these pillars is the first step toward building a routine that actually works. It's not just about passively stretching; it's about actively rebuilding the way your hips function.
True mobility isn't just about flexibility; it's about having usable, controlled strength through your entire range of motion. It's the key to moving efficiently and staying pain-free.
This guide is designed to show you exactly how to combine these elements for results that stick. A big part of that involves addressing the root cause of tightness. A great starting point is learning the secrets of foam rolling for tight hip flexors to help release that chronically knotted-up tissue.
We'll also show you how simple, portable functional training tools can make a huge difference. Using resistance bands, for example, is fantastic for waking up those sleepy glute muscles and is a perfect tool for travel. Floss bands can work wonders for improving how your tissues glide, allowing for a much deeper and more effective stretch. If you're looking to build out your toolkit, check out our guide to home workout equipment essentials.
From office workers to elite athletes, unlocking your hips is a complete game-changer. Let's get started.
How to Find Your Starting Point: Two Simple Tests
Before you jump into a random routine, we need to figure out what your hips actually need. Think of it like this: you wouldn't just start throwing parts at a car engine without knowing what's wrong, right? The same goes for your body.
Taking a few minutes to assess yourself is the most important step. It turns a generic list of exercises into a targeted plan that will actually get you results. These two quick tests will give you a clear picture of your specific limitations, whether it's tightness at the front of your hips or a lack of rotation.
This simple guide can help you think through what might be causing your hip issues.

This flowchart helps you narrow down whether you're dealing with general stiffness, inflammation, or a potential strain, which is a great first step in figuring out your next move.
Check Your Hip Flexors: The Thomas Test
Physical therapists have used the Thomas Test for decades—it's a classic for a reason. It’s a dead-simple way to see if the muscles on the front of your hip are too tight. If you spend a lot of time sitting, there's a good chance they are, and that can yank your pelvis forward and lead to nagging lower back pain.
Here's how you do it:
- Get set up: Sit right on the edge of a sturdy bench, table, or even your bed.
- Lock it in: Lie back while hugging one knee tightly to your chest. This is a crucial step because it keeps your lower back and pelvis from cheating the test.
- Let the other leg hang: Now, just relax and let your other leg hang completely free off the edge.
So, what are you looking for? In a perfect world, the back of your hanging thigh would rest flat on the bench, and your knee would naturally bend to about 90 degrees.
The Telltale Sign: Does your thigh pop up off the bench? Or does your lower leg straighten out on its own? That’s a clear signal you have tight hip flexors and/or quads on that side. This tells you exactly where to focus your efforts.
Check Your Hip Rotation: The 90/90 Test
Your hip is a ball-and-socket joint, meaning it's built to rotate. This test is a fantastic way to see how much control you have over that rotation, which is key for everything from a deep squat to changing direction quickly in a sport.
Here’s the breakdown:
- Front leg: Sit on the floor and bring one leg in front of you with the knee bent at a 90-degree angle. Your shin should be lined up in front of your torso.
- Back leg: Swing your other leg out to the side, also bent at 90 degrees. Your back thigh should point straight out from your hip.
- Stay tall: The goal is to sit upright with a proud chest, trying to keep both butt cheeks on the floor.
Can you get into this position without immediately wanting to fall over to one side? Is your back knee hovering way up in the air? If sitting here feels like a battle, or you get intense cramping, that's your body telling you that hip rotation is a major restriction. For those just starting their fitness journey and needing to build foundational strength, our guide on resistance band exercises for beginners can be a great resource.
Now you have some real data. You know what's tight and what's restricted, so you can stop guessing and start moving with purpose.
The Essential Toolkit for Mobile Hips
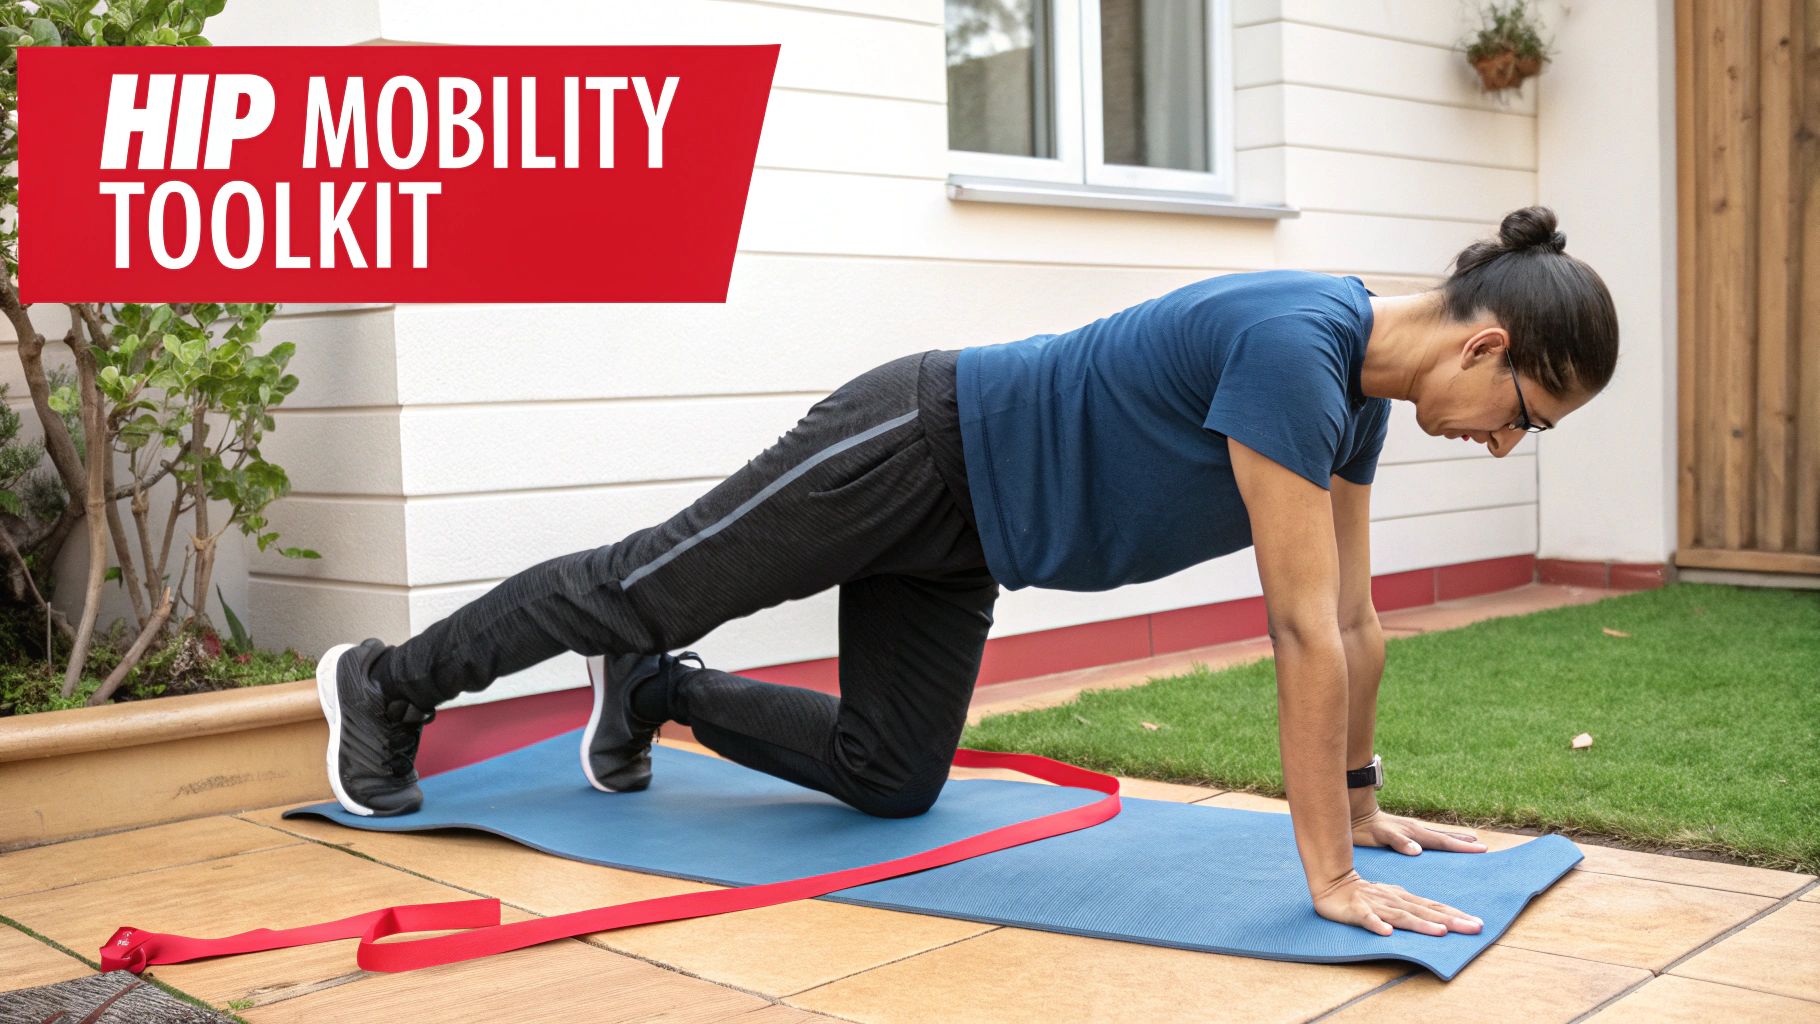
Now that you've pinpointed your specific limitations, it's time to build your personal library of movements. This isn't just about collecting random stretches; it’s about creating a toolkit of the most effective drills designed to systematically unlock your hips.
A truly well-rounded approach always combines two things: dynamic movements to warm up the joint and deeper stretches that create lasting change. Think of dynamic work as the key that starts the engine. Deep stretches are what give you a bigger, better engine over time.
Master Your Dynamic Drills
You should always start your mobility sessions with dynamic movements. These drills prep the tissues for the deeper work to come and are critical for teaching your nervous system how to actually control your newfound range. A common mistake I see is people jumping straight into static stretching, which can really blunt their results.
1. Hip CARs (Controlled Articular Rotations) If you do only one exercise for your hip health, make it this one. Hip CARs methodically move your hip through its entire rotational capacity, which is incredible for improving both joint awareness and control.
- How to do it: Get on all fours. Keeping your pelvis and lower back perfectly still, lift one knee up toward your chest. From there, slowly open the knee out to the side, then rotate it back and around in the biggest, smoothest circle you can manage. Focus on control, not speed. Aim for 2-3 slow, deliberate circles in each direction for both hips.
2. Leg Swings (Forward and Sideways) Deceptively simple but incredibly powerful. Leg swings use controlled momentum to gently encourage more freedom of movement in the hip socket.
- How to do it: Stand sideways to a wall for a bit of support. Swing one leg forward and backward like a pendulum, gradually letting the swing get a little higher each time. After about 15-20 swings, turn to face the wall and swing the same leg side-to-side across your body for another 15-20 reps. Switch legs and repeat.
3. Cossack Squats This is a fantastic movement for prying open the adductors (your inner thighs) while also challenging your single-leg stability and hip flexion.
- How to do it: Take a wide stance, pointing your toes out just a bit. Shift all your weight over to one side, squatting down as low as you can while keeping that heel glued to the floor. Your other leg stays straight. Flow smoothly from one side to the other for 8-10 reps per side.
Deepen Your Range with Key Stretches
Once you're warmed up, you can move into holds that target specific areas of tightness. The key here is to breathe deeply and never, ever push into sharp pain.
Pro-Tip: True mobility work is an active process. Don’t just collapse into a stretch and hang out. Try this instead: contract the muscles around the hip for 5 seconds, then relax as you exhale to sink deeper into the stretch. This technique is known as PNF, and it can seriously speed up your progress.
1. Frog Stretch This one is intense, but it's one of the best for opening up the adductors and groin. It's the perfect antidote to all the time we spend sitting with our knees together.
- How to do it: Start on all fours, then slowly walk your knees out wider until you feel a good stretch in your inner thighs. Make sure your ankles stay in line with your knees. From there, gently rock your hips forward and back for 60-90 seconds.
2. Pigeon Pose Variations A classic for good reason. The pigeon pose gets deep into the external rotators and glutes, including that pesky piriformis muscle that can cause all sorts of sciatic-like trouble.
- How to do it: From a plank, bring your right knee forward toward your right wrist, letting your shin angle across the mat. Extend your left leg straight back behind you. You can stay upright to feel a deeper stretch in the hip flexor, or fold forward over your front leg to really target the glute. Hold for at least 60 seconds per side.
Amplify Your Results with Functional Training Tools
The right tools can take your hip mobility practice from good to great. They offer resistance and feedback that helps your body learn and solidify new movement patterns much more efficiently.
-
Resistance Bands: Try putting a light loop band around your knees during glute bridges or squats. It forces your gluteus medius (a key hip stabilizer) to kick in, teaching your hips how to stay stable through a full range of motion. This is a game-changer for building a powerful squat and running pain-free. These bands are incredibly portable, making it easy to maintain your routine while traveling.
-
Floss Bands: For those spots that just feel "stuck," wrapping a floss band can make a huge difference. You can learn more about how to use a MONFIT Floss Band to enhance tissue glide during a stretch. The compression helps break up minor adhesions and improves how well tissues slide over one another while you move, which can increase range of motion and reduce pain.
To round out your routine, consider adding some effective hip flexor exercises to specifically target the front of the hip. The impact of a focused, consistent routine is backed by research. One study showed that a simple daily lunge-and-reach stretch increased hip flexor length by nearly 6 degrees. Even better, this simple addition boosted glute power, improving single-leg broad jump distance by over 12 cm. It's a perfect example of how unlocking mobility directly translates to real-world performance.
By building a toolkit with these dynamic drills, deep stretches, and smart tool integration, you're setting yourself up for healthier, more mobile hips for the long haul.
Building Stability for Lasting Mobility
Stretching is a great start, but it's only half the equation. If you don't build strength to support that newfound range of motion, you’re essentially building a house on a shaky foundation.
True, functional mobility is a partnership between flexibility and stability. Without a strong base, all that extra room in your joints is just uncontrolled movement—an open invitation for injury.
This is where we shift our focus from passive stretching to actively strengthening the muscles that control the hip joint. We need to wake up the muscles that have gone dormant from too much sitting, especially the glutes, deep core stabilizers, and even the adductors (your inner thighs). By building this support system, you're teaching your body how to safely use its new mobility, making every improvement last.
Activating Your Hip Stabilizers
The goal here isn't to lift heavy. It's all about mindful muscle activation and feeling the right muscles fire at the right time. This is where tools like Loop Bands are incredibly useful, giving you that tactile feedback to help you target specific muscles.
Banded Glute Bridges
This is a cornerstone exercise for waking up your glutes. It teaches them to be the primary engine for hip extension, which takes a ton of stress off your lower back.
- How to do it: Lie on your back with your knees bent, feet flat on the floor, and a Loop Band just above your knees.
- The key: Before you even lift, actively press your knees out against the band. You should feel the sides of your hips (gluteus medius) turn on. Drive through your heels to lift your hips until you have a straight line from shoulders to knees. Squeeze your glutes hard at the top—don't just arch your back.
- What to feel: You’re looking for a powerful contraction in your glutes, not your hamstrings or lower back. Lower down with control.
- The prescription: Aim for 3 sets of 15-20 reps. Hold the top position for a solid 2-second count on each rep.
Side-Lying Hip Abduction (Banded Clamshells)
This move zeros in on the gluteus medius, the muscle on the side of your hip that's crucial for preventing your knees from caving inward during squats, lunges, and running.
- How to do it: Lie on your side with your hips and knees bent and your feet stacked. The Loop Band should be just above your knees.
- The key: Keep your feet touching and lift your top knee toward the ceiling. The trick is to do this without rocking your torso back. The movement has to come purely from your hip.
- What to feel: Imagine a glass of water balanced on your top hip—don't let it spill. This keeps the work in your glutes instead of letting your obliques and back compensate.
- The prescription: Go for 3 sets of 15-20 reps per side, focusing on a slow, controlled motion.
Integrating Strength into Functional Movement
Once you've woken up the key stabilizers, it's time to teach them how to work during more complex movements. This is how your brain learns to use these muscles in the real world, whether you're picking up groceries or hitting a new PR on your squat.
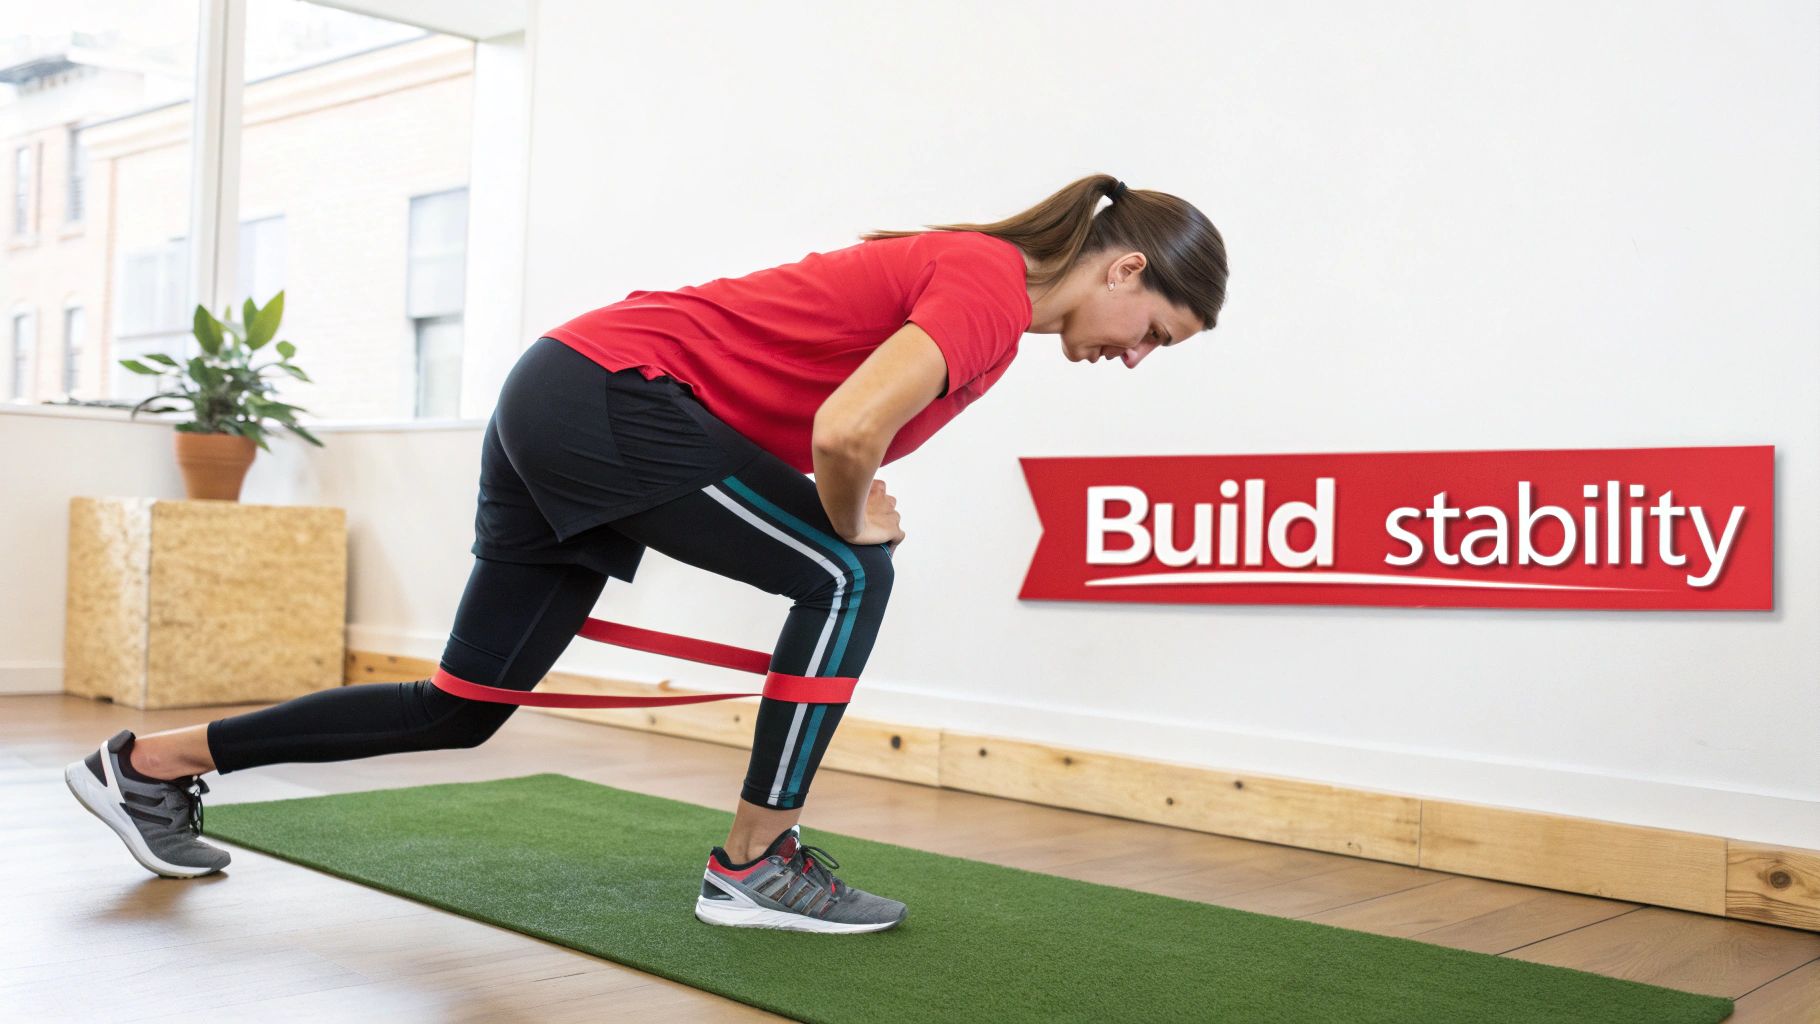
Single-Leg Romanian Deadlift (RDL)
The single-leg RDL is a powerhouse for building one-sided strength, balance, and stability. It challenges your entire posterior chain—glutes, hamstrings, and lower back—while teaching your hip to function as a stable hinge.
- How to do it: Stand on one leg with a soft bend in the knee. Keep your back straight and core braced.
- The key: Hinge at your hip, sending your non-standing leg straight back behind you as your torso lowers toward the floor. Keep your hips square to the ground. It’s very common to want to open up the hip of the lifted leg, so fight that urge.
- What to feel: You should feel a deep stretch in the hamstring of your standing leg. To come back up, drive through your heel and squeeze your glute.
- The prescription: Start with just your bodyweight. Perform 3 sets of 8-12 controlled reps per leg.
By strengthening the muscles that control the hip, you're not just improving mobility—you're building resilience. This active control over your range of motion is what separates fragile flexibility from durable, athletic movement.
Strengthening these supporting muscles is the secret to making your mobility gains both safe and permanent. It ensures that as you learn how to improve hip mobility, your body has the stability to handle it. The resistance band workout benefits for this kind of corrective work are massive; you can explore more ideas in our detailed guide.
Putting It All Together: Your 4-Week Hip Mobility Plan
So, we’ve covered the anatomy and run through some killer drills. That’s all great, but information without a plan is just noise. This is where the rubber meets the road—a clear, progressive 4-week program that takes the guesswork out of the equation.
Think of this not just as a list of exercises, but as your roadmap. Consistency is everything when it comes to unlocking tight hips, and having a schedule to follow is the single best way to make sure you show up.
How to Fit This Into Your Life
The best routine is the one you actually do. You don't need to blow up your current schedule. Just find a consistent 15-20 minute slot.
You can run through these sessions as a dynamic warm-up before hitting the weights, as a dedicated cool-down to kickstart recovery, or even as a standalone session on an off day to get the blood flowing. The key is just to commit and listen to what your body is telling you.
The secret to unlocking stiff hips isn't one perfect workout; it's the cumulative effect of consistent, intelligent work over time. Small daily efforts compound into significant long-term gains in mobility and resilience.
This plan works because it’s built on progressive overload. Each week, you'll subtly increase the challenge—maybe by holding a stretch a little longer, adding a few more reps, or graduating to a tougher variation. This is how you avoid hitting a plateau and keep your body adapting for the better.
4-Week Progressive Hip Mobility Schedule
Here's a sample schedule to guide you. It shows how you can layer in the mobility drills, stretches, and corrective strength work over the next month.
| Week | Weekly Focus | Sample Routine (15-20 Mins) | Progression Tips |
|---|---|---|---|
| 1 | Foundation & Activation |
Warm-Up (3 mins): Hip CARs, Leg Swings. Stretches (6 mins): Pigeon, Frog (60s/side). Strength (6 mins): Banded Glute Bridges 2x15. |
Forget about pushing your limits. Just focus on perfect form and feeling the right muscles engage. Find your baseline range of motion without pain. |
| 2 | Increasing Range & Control |
Warm-Up (3 mins): Add in Cossack Squats. Stretches (7 mins): Pigeon, Frog (75s/side). Strength (7 mins): Bridges 3x15, Clamshells 2x15. |
Try to sink just a fraction deeper into your stretches. Make your Hip CARs bigger and slower—the goal is absolute control through the entire circle. |
| 3 | Building Endurance in New Ranges |
Warm-Up (3 mins): As before. Stretches (8 mins): Pigeon, Frog (90s/side). Strength (9 mins): Bridges 3x20, Clamshells 3x15, Bodyweight RDLs 2x8. |
Now we're extending the time under tension. Really focus on that mind-muscle connection during your strength work. Every single rep should be deliberate. |
| 4 | Integrating Functional Strength |
Warm-Up (3 mins): As before. Stretches (8 mins): As before. Strength (10 mins): Bridges 3x20, Clamshells 3x20, RDLs 3x10. |
Let’s add a challenge. Squeeze for a full 2-second pause at the top of your glute bridges and clamshells. See if you can stay perfectly stable on those RDLs. |
This schedule is a solid framework, but it’s not set in stone. If your adductors are screaming after a squat day, spend an extra minute in that Frog stretch. The most effective plan is always going to be the one you can stick to week in and week out.
And if you want more ideas for getting the most out of your bands, check out our complete guide to resistance band exercises at home.
Stick with this for four weeks. You won't just feel looser—you'll have a much deeper understanding of how your body is truly meant to move.
Your Hip Mobility Questions, Answered
As you start working on your hips, you're bound to have some questions pop up. It's a natural part of the process. Let's tackle some of the most common ones I hear from clients to make sure you stay on track and feel confident in your routine.
How Often Should I Be Doing These Exercises?
Consistency beats intensity every single time, especially with mobility work. I've found the sweet spot for most people is doing 10-15 minutes of focused hip work 3 to 5 times per week.
This doesn't have to be a whole separate workout. You can weave it right into your current schedule. A lot of people find success using these drills as a dynamic warm-up before hitting the weights or going for a run. Others prefer to use them as a cool-down to wind down. You can even do a session on your rest days—it’s a fantastic way to boost recovery.
If you’re starting out feeling like the Tin Man, don’t be discouraged. Even a quick 5-minute session every day will make a world of difference. The golden rule is simple: listen to your body. Never push into pain.
I Have a Desk Job. Is Better Hip Mobility Even Possible?
Absolutely. In fact, if you have a desk job, this kind of routine is non-negotiable. Sitting for hours is a primary culprit behind tight, achy hips, and a targeted mobility plan is the perfect antidote.
One of the most powerful things you can do is simply break up the sitting. Set a reminder to get up and walk around for a couple of minutes every 30-60 minutes. You can also sneak in some "micro-stretches" at your desk. The seated figure-four stretch is a personal favorite for keeping the hip rotators from getting glued down.
When you commit to the 15-minute routine in this guide outside of work, you’re actively fighting back and reversing the negative patterns your desk job creates.
What’s the Real Difference Between Flexibility and Mobility?
This is a fantastic question, and getting the distinction is key to training smarter. Here’s how I break it down for my athletes:
- Flexibility is passive. It's about a muscle's ability to lengthen. Think of someone pushing your leg a little deeper into a hamstring stretch—you aren't controlling that end range.
- Mobility is active. It’s your ability to control your joint through its full range of motion. This requires strength, stability, and coordination, not just loose muscles.
We're zeroed in on mobility in this program because that’s what translates to real-world performance. It’s what allows you to squat deeper safely or change direction on a dime without getting hurt. Flexibility is just one piece of the mobility puzzle.
True mobility is the marriage of flexibility and stability. It's not just about how far you can stretch; it's about how much of that range you can actively control and use.
When Will I Actually Feel a Difference?
Everyone’s body is a bit different, but progress usually follows a pretty consistent timeline.
You’ll likely feel the first changes within two weeks. This isn't usually a dramatic increase in your squat depth, but more of a subtle shift. You might notice that you feel less stiff getting out of your car, or that your warm-ups just feel smoother.
The bigger, more noticeable improvements—the kind you can actually measure and see in your lifts—typically take about 4 to 8 weeks of consistent work to lock in. It’s crucial to see this as a long-term investment in your body, not a quick fix. We're building healthy, resilient joints that will support you for years to come.
Ready to build that sustainable mobility? The right tools can make all the difference by providing the resistance and feedback needed for effective activation and stretching. MONFIT offers a complete suite of durable resistance bands, loop bands, and floss bands designed to support every step of your journey. Explore the full collection and start building a more resilient body today at https://monfitness.com.


